Recent Posts

Moog One - Initial Findings

The Linux subsystem to the Moog One was one of the reasons I was drawn to it, the potential hacking on it. Here are some of my initial findings from exploring Linux on the One. These notes are by no means complete or guarenteed to be correct. I hope to expand on each area at some point but wanted to get this out to help with others looking into the One.

When you break something, hold down the main encoder while powering on to go into a recovery mode. You can scroll through a couple firmware options, current, last installed and original v1.0.0.

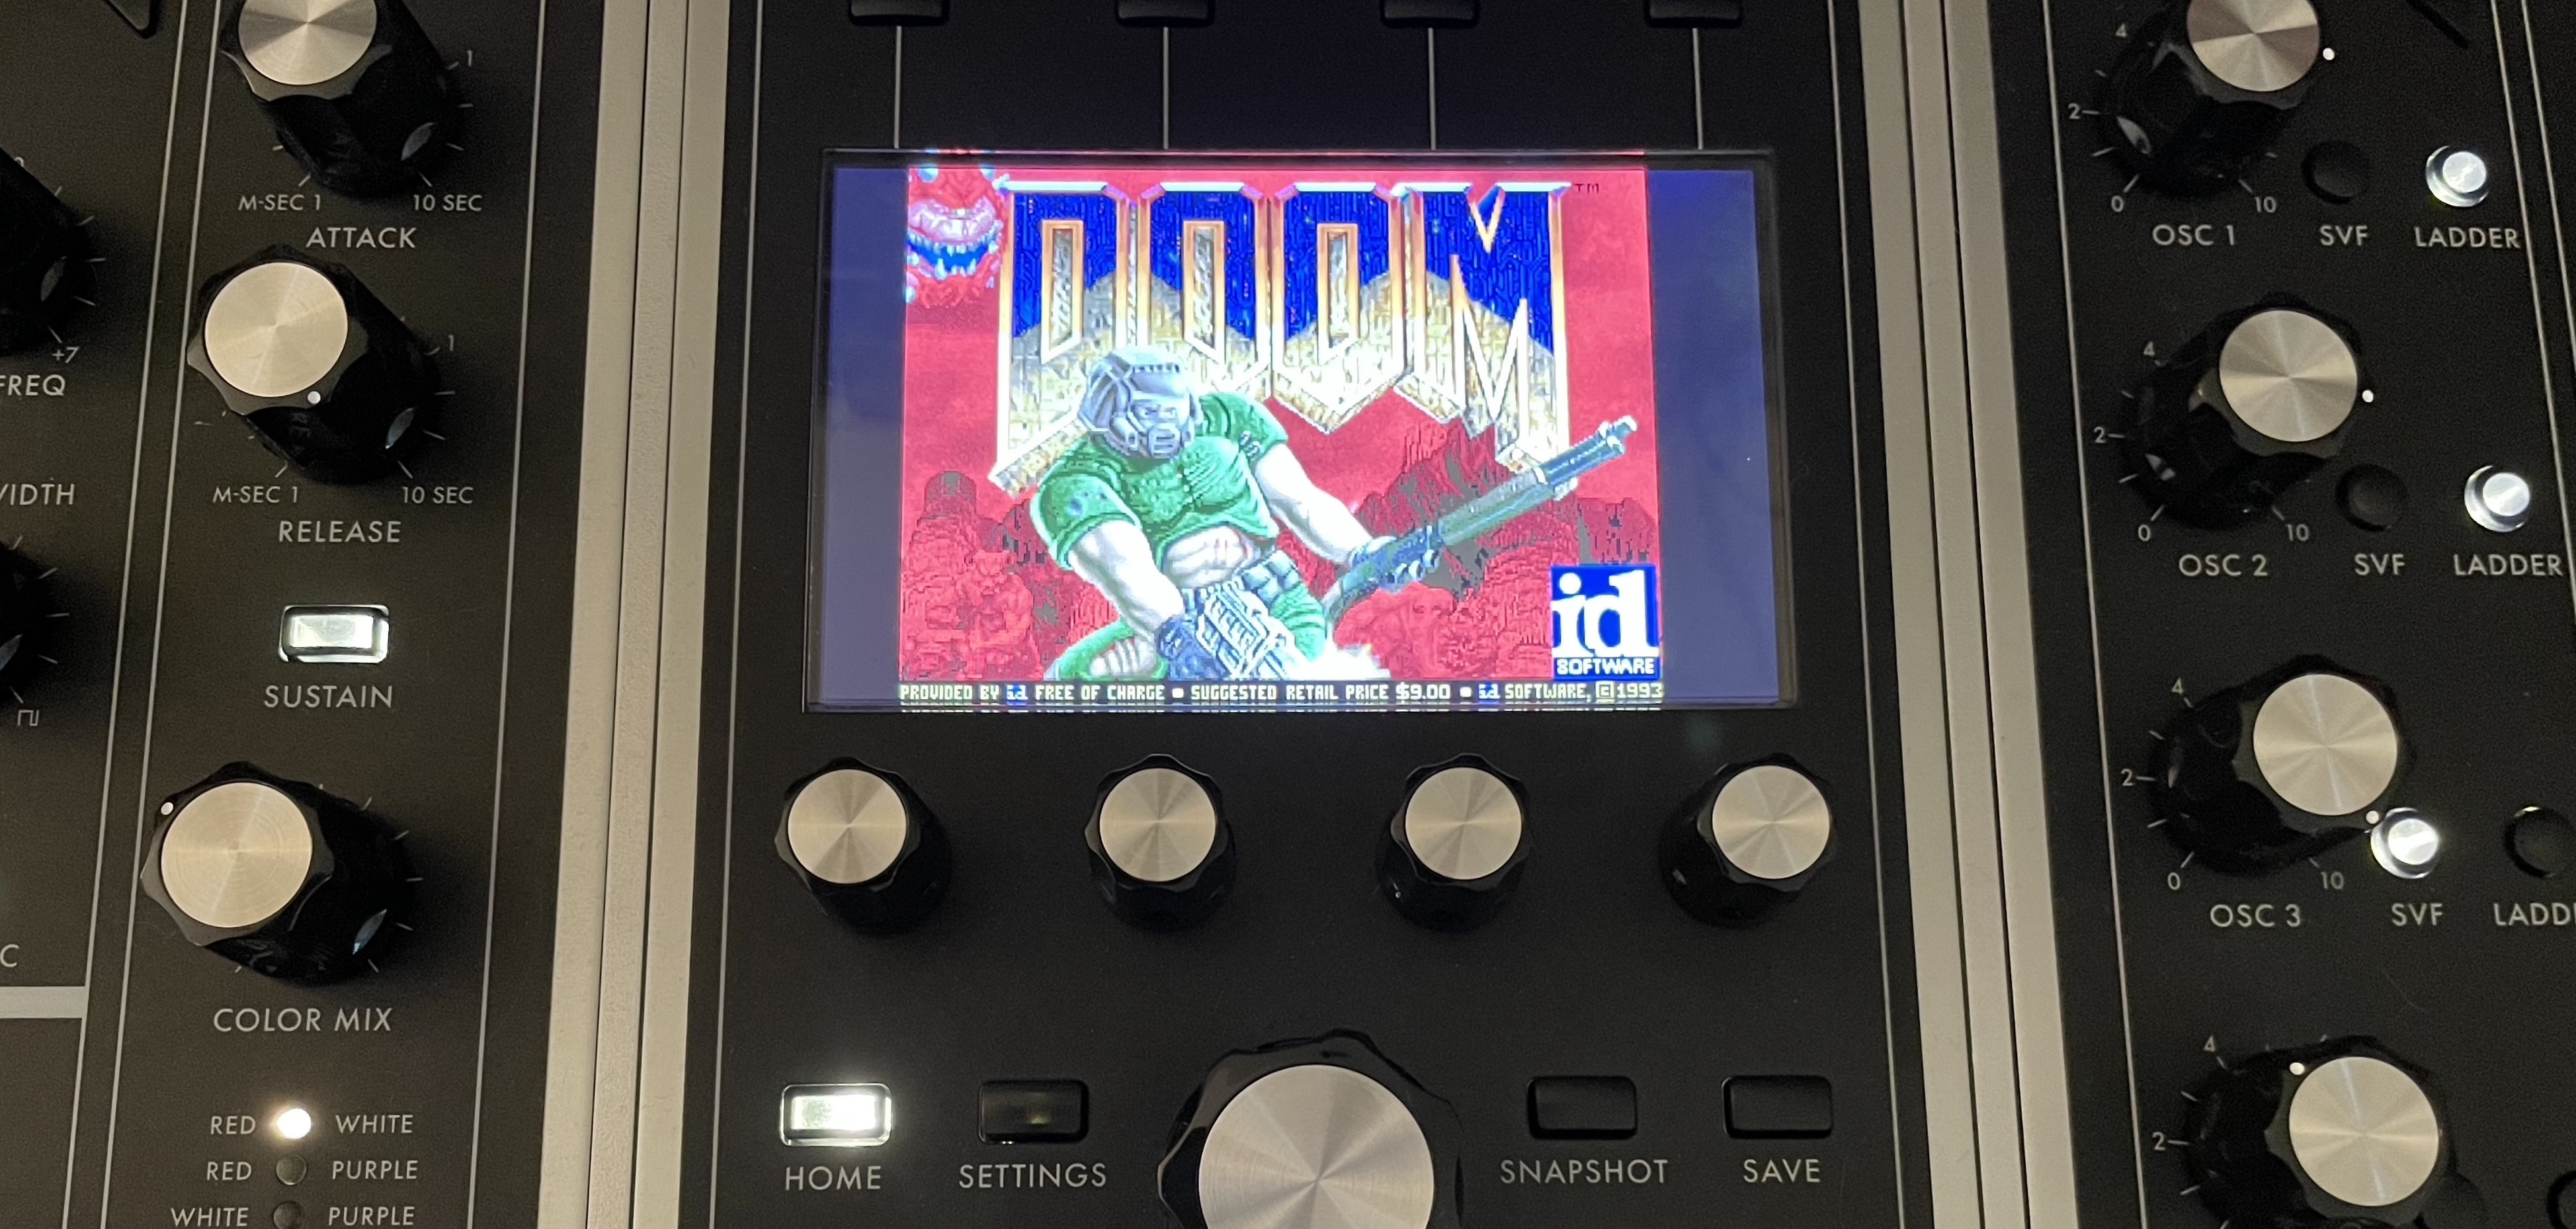
Holding Home + Settings at the end of boot will launch into a service menu which has a few options. There is a phone home which initiates a SSH tunnel for someone to work on your One remotely. There is a fantastic splash screen for it:

References

A couple very long forum threads, mostly sonic related but there were a few references to system.

Amos discussing Moog’s new synth https://www.youtube.com/watch?v=V7gfaw0JQaE (local mirror Part 1, Part 2, Part 3, Part 4)

Effects

The on board effects are done with SuperCollider. They can take up a good chunk of CPU depending on which are enabled, a breakdown of CPU usage is in /usr/share/las-fx/util/cpu.rtf. This is one area that is definitely ripe for exploring, possibility of GUI elements and adding more SuperCollider effects.

  • /etc/init.d/S42sc launches las-sc which in turn starts a screen session for /usr/share/las-fx/launch-sc-1
  • Effects home /usr/share/las-fx lots of goodies to look through in there.

Firmware Updates

image-right

The firmware update file, eg: moog-one-v1.4.0, is a tar with a few files:

  • IMAGE-SIG GPG signature of rootfs
  • MANIFEST JSON file with some details of the update
  • MANIFEST-SIG GPG signature of the MANIFEST
  • MOOGFW Always 0
  • rootfs GPG Encrypted ext4 filesystem
    {
      "MOOGFW": "0",
      "version" : "las-v1.4.0",
      "format" : "re",
      "image" : "rootfs",
      "packed_size" : "156570496",
      "unpacked_size" : "669948928",
      "sig" : "IMAGE-SIG",
      "ctime" : "2020-06-15T15:10:32+00:00",
      "git" : "NULL"
    }

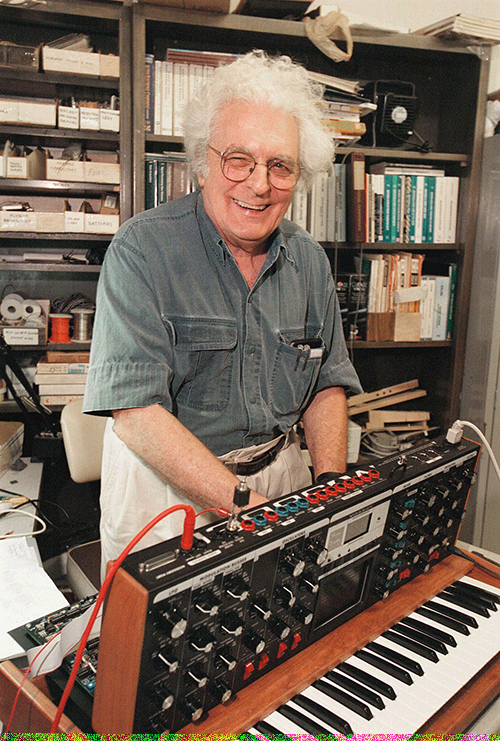
The rootfs file is encrypted but can be decrypted with keys in the One. /usr/bin/lasfwu handles the updates, verifying and installing. The private key is embedded? (stenography?) in this photo of Bob Moog. It is pulled out using /usr/bin/str which is small, could disassemble to find out for sure, maybe it’s just pulling out the least signifigant bits in the image which is hiding the GPG key.

I’m not sure if the available keys are enough to sign a modified firmware. It doesn’t really matter, we have access to the system no need to package and sign a new firmware. It is nice to be able to decode the firmware updates though. I’ve been doing this and running a diff between versions to identify points of interest.

# Get the keys from in the One
str /etc/bob.bmp 4 > /root/bob-pk

# Transfer these keys off the One:
/root/bob-pk
/usr/share/sec/mmepubk
/usr/share/sec/mmspubk

Now we can use the keys on another system to decrypt the firmware updates. If ever prompted for a password, it is bob.

tar -xf moog-one-v1.4.0
gpg --import mmepubk mmspubk bob-pk
gpg --always-trust --ignore-time-conflict --ignore-valid-from --passphrase bob --output "rootfs-decrypted.ext4" --decrypt rootfs
mkdir -p /mnt/one-fs
mount -t ext4 rootfs-decrypted.ext4 /mnt/one-fs

Open Sound Control (OSC)

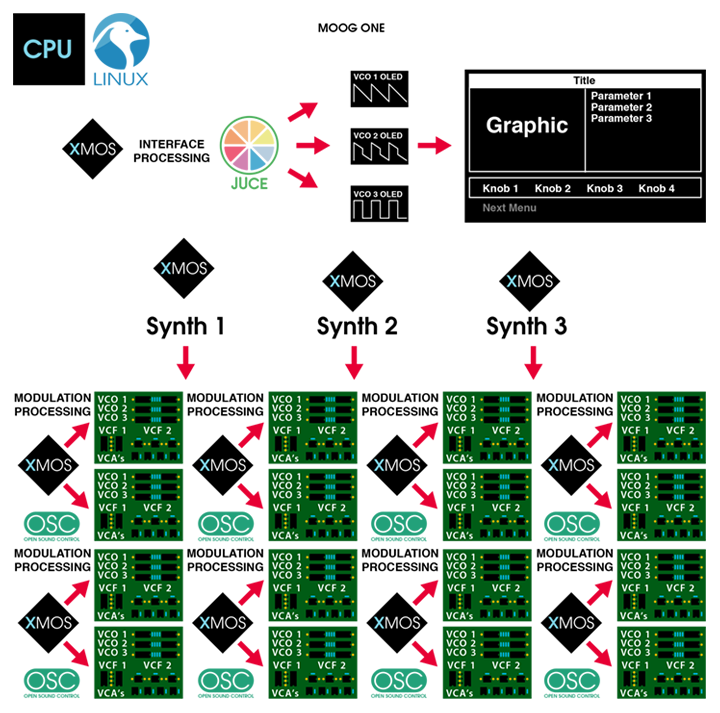
This deserves a more thorough look. OSC is used to communicate between the front panel, voice cards, effects and more. I’ve tried, unsuccessfully, to send some simple OSC messages remotely to emulate keyboard input. Maybe missing some iptables rules. Even replaying tcpdumps didn’t work.

The program arguments help identify the different components to the system.

# Sound engine, runs as
$ /usr/bin/las-sc \
  -t vc \
  -f localhost:7775 \
  -l localhost:9300 \
  --vxfw=/usr/share/xmosfw/app_vx_10M_v1.0.14rc8.bin \
  --vxdb=/var/tuning.vxtune \
  --vcfw=/usr/share/xmosfw/app_las_v1.0.17rc2.bin \
  --vcfv=16781570 \
  --temp \
  --expr-syms=/usr/share/vx_ee.scm \
  --panel-state=localhost:9500 \
  -q


# The helpful usage output.
las-sc [options]
 -t, --target=ARG         Xmos Target address
 -l, --listen=ARG         Listen address (default localhost:9300
 -m, --mode=ARG           Put VC in given mode at startup
 -f, --fx=ARG             EFX Server address (optional)
     --manual-fx          Flag to indicate that fx will be booted manually, but that las-sc should still attempt to connect.
     --cli                Command-line interface mode - updates firmware, then exits without launching fx.
     --vcfw=ARG           Voice control firmware file. If not given, VC is not not checked or updated.
     --vcfv=ARG           Expected voice control firmware version.
 -p, --panel-state=ARG    Panel state query address.
     --vxdb=ARG           Voice Card Tuning Data
     --vxfw=ARG           Voice card firmware file. If not given, voice cards are not checked or updated.
     --force-vx-update    Update VX firmware even if versions match.
 -o, --ofs-cache=ARG      Offset cache file. If given, offset data are periodically gathered from the VX and written to this file. At startup, offsets are transmitted back to the cards.
 -v, --version=ARG        Display version information and exit.
     --temp               Enable SOM temperature polling.
 -m, --mod                Flag for VX HW Mod.
 -q, --quiet              Keep silent during operation
     --expr-syms=ARG      File containing symbols for use in expressions.
 -h, --help               Display usage text


The argument options for las-frontend won’t output from command line but this is what I found in the binary.

$ las-frontend \
  --usb-path=/media/thumbdrive \
  --data-path=/var/las-frontend \
  --host-paneloutput=203.0.113.2 \
  --host-performance=vc \
  --host-oleds=203.0.113.2 \
  --affinity-mask=1 \
  --host-systemclock=vc \
  --cookie=1 \
  --affinity-panel=1 \
  --startup-coordination \
  --host-vc=vc

# Usage found in binary
Usage: 
 [ commands ]
Commands:
  --version              Displays detailed version information
  --data-path=<path>     Configure which path to store the data files into
  --startup-coordination Coordinate the startup with the sound engine controller
  --example-data         Populate a seperate DB with example data and use it
  --disable-tests        Force the tests to not run, even for a debug build
  --enable-tests         Force the tests to run, even for a release build
  --cookie=<string>      Cookie value to write out once startup is fully completed
  --port-response=<p>    Sets UDP port to send OSC tree responses to (dflt 
  --port-panelinput=<p>  Sets UDP port to listen to for panel data (dflt 
  --port-paneloutput=<p> Sets UDP port to send panel messages to (dflt 
  --port-oleds=<p>       Sets UDP port to send OSC OLED messages to (dflt 
  --port-perfinput=<p>   Sets UDP port to receive OSC performance messages from (dflt 
  --port-perfoutput=<p>  Sets UDP port to send OSC performance messages to (dflt 
  --port-systemclock=<p> Sets UDP port to send system clock messages to (dflt 
  --port-vc=<p>          Sets UDP port to send OSC VC messages to (dflt 
  --port-efx=<p>         Sets UDP port to send FX server messages to (dflt 
  --host-response=<h>    Address for OSC tree response (dflt 
  --host-panelinput=<h>  Address for OSC panel input messages (dflt 
  --host-paneloutput=<h> Address for OSC panel output messages (dflt 
  --host-oleds=<h>       Address for OSC OLED messages (dflt 
  --host-performance=<h> Address for OSC performance messages (dflt 
  --host-systemclock=<h> Address for system clock messages (dflt 
  --host-efx=<h>         Address for FX server messages (dflt 
  --host-vc=<h>          Address for OSC VC messages (dflt 
  --vx-ee-path=<path>    Path for expression engine scm definition file
  --usb-path=<path>      Path for USB drive
  --firmware-path=<path> Path for firmware updates (overrides USB path)
  --firmware-dry-run     Performs the firmware update in dry-run mode
  --midi-in              Name of MIDI input device
  --midi-out             Name of MIDI output device
  --affinity-mask=<m>    Sets an affinity mask for the frontend threads
  --affinity-panel=<m>   Sets an affinity mask for the panel messages threads
  --enable-osc-sec       Send all sound engine messages through the old osc protocol
  --assume-auto-polling  Assume that auto polling is active by default
  --log-perf-osc         Enable logging of received performance OSC messages
  --log-panel-osc        Enable logging of received panel OSC messages
  --log-tree-osc         Enable logging of sent OSC tree message
  --log-thread-heartbeat Enable logging of thread activity
  --script=<path>        Runs the JavaScript at the provided file path
  --upside-down-ui       Renders the entire UI upside down
  --touch-to-vco         Generate VCO pitch offset messages for touch panel
  --always-on-top        Keep application always at the front of other windows

Other

# Set framebuffer opacity
$ las-fb-config framebuffer [0,1] [ alpha_val[0-255] ]


Moog One - Doom

What do you do once you get access to a new Linux system, install Doom of course! This turned out to be a bit more complicated due to the LCD being mounted upside down. Perhaps for better viewing angles from the playing position or case fitment. The firmware handles the LCD orientation in a couple ways. For framebuffer, early boot splashes, the spash being displayed is already upside down. On launching the X session in /etc/init.d/S43gui the session is flipped with DISPLAY=:0 xrandr -o inverted.

I went with Chocolate Doom for no particular reason, just needed to cross-compile it for the ARMv7 inside. Instead of setting up a proper cross compiler toolchain environment I used a Raspberry Pi I had sitting around. The CPUs are very similar and is quite a bit easier for a quick build.

A small patch was needed to rotate the screen. The full patch is available here: chocolate-doom-patch.diff.

// Part of patch to src/i_video.c to flip and mirror the screenbuffer.
SDL_LockSurface(screenbuffer);
SDL_Surface *tmp_screenbuffer = SDL_ConvertSurface(screenbuffer, screenbuffer->format, SDL_SWSURFACE);
for (int y = 0; y < screenbuffer->h; y++) {
	for (int x = 0; x < screenbuffer->w; x++) {
		putpixel(screenbuffer, x, y, getpixel(tmp_screenbuffer, screenbuffer->w - x - 1, screenbuffer->h y - 1) );
	}
}
SDL_UnlockSurface(screenbuffer);
SDL_FreeSurface(tmp_screenbuffer);

With the patch complete we can build Chocolate Doom.

apt install build-essential dh-autoreconf libsdl-mixer1.2-dev libsdl1.2-dev libsdl-net1.2-dev
wget https://github.com/chocolate-doom/chocolate-doom/archive/refs/tags/chocolate-doom-2.3.0.tar.gz
wget https://archive.ryanzachry.com/moog-one/chocolate-doom-patch.diff
tar -xzf chocolate-doom-2.3.0.tar.gz
cd chocolate-doom-2.3.0
patch -p1 < ../chocolate-doom-patch.diff
./autogen.sh
make

Now to transfer over the resulting binary and a WAD file. moog-one-doom.zip has the already patched and built Doom along with a shareware WAD. While it is playable there is much more to be done, no sound, needs USB keyboard and the X session is destroyed after quitting. It would be cool if Doom routed the MIDI to the One for the music, I’ll leave that exercise for someone else.


Moog One - SSH Access

The short version, extract this k.zip to the root of a usb drive. Boot the Moog One with the drive in, ethernet connected and you now you can login with SSH as root, no password.

On my initial teardown I found exactly what I was hoping for, serial access to the system which would likely be tied to the console. After a quick check on the scope for activity and voltage levels I soldered a couple wires to the pads and was pleasntly greeted with boot messages and finally a login prompt!

U-Boot SPL 2013.10 (Jul 30 2018 - 09:36:38)
DDR configuration
Ram size 512
Boot Device : MMC
mmc_id...1
Setting bit width...4
Load image from RAW...
Encoder not pressed boot straight to OS
Setting bit width...4
Boot OS Args read...256
loaded kernel...0
Entering kernel arg pointer: 0x18000000
Uncompressing Linux... done, booting the kernel.
...snip...

Here is the full boot log from serial console, serial-boot.txt, and dmesg output from a recent boot, dmesg-boot.txt.

Login with root, no password and we’re in! First order of business was to get SSH up since I didn’t want to leave some wires hanging out for console access. Since the Moog One has an ethernet port I figured it would already be in here. After some poking around in the system I found an init script for dropbear (SSH) in /etc/init.d/S50dropbear.

# Excerpt from /etc/init.d/S50dropbear
if [ -e /media/thumbdrive/k ]; then
	keyval=`hexdump /media/thumbdrive/k | awk '{print $3 $2}'`
	if [ $keyval = 23051934 ]; then
		echo "`date` : DROPBEAR : You have a key! Aren't you special!" >> /var/log/messages
		start-stop-daemon -S -q -p /var/run/dropbear.pid \
			--exec /usr/sbin/dropbear -- $DROPBEAR_ARGS
		[ $? = 0 ] && echo "OK" || echo "FAIL"
		exit;
	fi;
fi;

So, it looks like we want to have a special k file on a thumbdrive while booting. I don’t know the origin of the k file, if this is just the start of a larger file but for the purpose of starting SSH all we need is a file with those initial bytes.

echo -ne "\x34\x19\x05\x23" > k

The filename must be just a lower case k with no extension, in the root of the usb drive. Here is a zip with the file that can be extracted on your drive. k.zip

ryan@laptop:~$ ssh root@192.168.0.204
# bash
las-production:/var/local/root$ uname -a
Linux las-production 4.1.15-rt18 #1 SMP PREEMPT RT Tue Mar 31 17:15:09 EDT 2020 armv7l GNU/Linux
las-production:/var/local/root$

And we’re in! Now the real exploration can begin.


Moog One - A Look Inside

We’ll kick things off by taking a look inside the Moog One. Removing the underside panels leaves you with this lovely view. The voice card stacks are under the black fan shrouds on either side. They are stacked 4 per side with 2 voices per card giving the 8 or 16 voice options.


Moog opted for an external power supply so not much going on at the power input, some protection and filtering.


The IO for most of the jacks.


The fan noise can be a bit much even in ideal conditions. When first turning on the One they spin full speed sounding very much like a server turning on. In an air conditioned environment they don’t spin very fast but are noticeable. I found that putting in silicone mounts instead of the screws substantially reduced the noise, it’s still there but its more of a whoosh and less whine.


This is the controller / interface to the voice cards. Underneath is the carrier for the system on module (SOM) which runs Linux.


One of the voice cards. They are stacked 4 high with 2 voices per card and 1 stack on either side of the synth.


Finally, the carrier housing the SOM card. Note the pads below the SOM, specifically the SOMRX and SOMTX. These are serial RX and TX pins I used to get a Linux console which I will pick up in more detail in part 2.

Some kind of ARM based system on module with 2GB DDR3 (H5TQ2G63FFR) and 8GB eMMC (NCEMASD9-08G).

I’ll have to do a more thorough teardown some day. This was primarily to look at the voice cards and what’s running the Linux system.


Mounting XenServer .xva in place

With a bunch of VM backups as XenServer exported .xva files I found sometimes I just wanted a file and not looking to restore the whole VM. After digging into the file format a bit I put together xvatodisk.pl which will allow you to mount (read only) the disks in an XVA, in place. It does so by mapping out the XVA and using device-mapper to make the device.

You need dmsetup and partprobe installed, on Debian: apt-get install dmsetup parted && modprobe dm_mod

XVA Format

An XVA is just a tar with a structure of:

ova.xml
Ref:1234/
    00000000
    00000000.checksum
    00000010
    00000010.checksum
    ...
Ref:567/
    00000000
    00000000.checksum
    ...

ova.xml describes the virtual machine. For every disk in the VM there is a Ref:<\d+> directory. In that directory are 1 MB chunks (\d{8}) and an SHA1 checksum for that chunk (\d{8}.checksum).

There will always be a first and last chunk for the disk. Gaps in the numbering are for chunks that are empty. Sometimes there is a chunk with a size of 0 but I haven’t seen any that are in between 0 and 1048576 bytes.

#!/usr/bin/env perl
use strict;
use warnings;
use Fcntl qw/SEEK_SET/;
use Storable qw/store retrieve/;
use File::Temp;
use Getopt::Long;
use Pod::Usage;

use constant CHUNK_SIZE  => 1048576;
use constant SECTOR_SIZE => 512;

=head1 NAME

xvatodisk - Makes disks in a XVA file available for mounting read-only.

=head1 SYNOPSIS

xvatodisk -x </path/to/exported.xva> [-m </path/to/saved.map>]

=over

=item arguments:

  -h, --help     display this help
  -x, --xva      path to xva to use
  -m, --map      path to map of xva to use or save

=back

=head1 DESCRIPTION

=cut

my ($xva_file, $xva_map_file, $help);
my $opt = GetOptions(
	"xva|x=s" => \$xva_file,
	"map|m:s" => \$xva_map_file,
	"help|h"  => \$help
);

pod2usage(1) if (!$opt || $help || !defined($xva_file) || !-e $xva_file);

# Mapping the xva can take a while on large files, save the map.
$xva_map_file ||= $xva_file . "-map";
my $xva = (-e $xva_map_file) ? retrieve($xva_map_file) : make_xva_map($xva_file, $xva_map_file);

# There can be multiple disks in an xva.
my $disks_found = scalar keys %$xva;
die "No disks were found in $xva_file" if ($disks_found == 0);

# Only need 1 loop device for all the disks.
chomp(my $loop_dev = `losetup --find`);
system("losetup", "--read-only", $loop_dev, $xva_file);

for my $id (keys %$xva) {
	printf "Disk Ref:$id (%.02f GB) -> /dev/mapper/xva-$id\n", $#{$xva->{$id}} / 1024;
	
	my $tmp = File::Temp->new(TEMPLATE => "dmtable-XXXX", SUFFIX => ".map");
	print $tmp make_dmtable($xva->{$id}, $loop_dev);

	system("dmsetup", "--readonly", "create", "xva-$id", $tmp->filename);
	`partprobe /dev/mapper/xva-$id 2>&1 > /dev/null`;
}

# Try and close things out on ctrl-c.
$SIG{INT} = sub {
	print "\ncleaning up...\n";

	for my $id (keys %$xva) {
		for (`ls -fXr /dev/mapper/xva-$id*`) {
			chomp();
			system("dmsetup", "remove", $_);
		}
	}

	system("losetup", "--detach", $loop_dev);
	exit;
};

sleep 1 while 1;


#-------------------------------------------------------------------------------
# Returns a table for dmtable that maps the disks.
#-------------------------------------------------------------------------------
sub make_dmtable {
	my ($disk_map, $loop_dev) = @_;

	my $table        = "";
	my $sector       = 0;
	my $total_chunks = scalar(@$disk_map);

	for (my $chunk_num = 0; $chunk_num < $total_chunks; $chunk_num++) {		
		if (defined(my $chunk = $disk_map->[$chunk_num])) {
			# Offset is at ->[1], size at ->[0]
			# Checksum files follow each chunk preventing continuos data.
			$table .= sprintf "%i %i %s %s %i\n",
				$sector,   $chunk->[1] / SECTOR_SIZE, "linear", 
				$loop_dev, $chunk->[0] / SECTOR_SIZE;

			$sector += $chunk->[1] / SECTOR_SIZE;
		}
		else {
			# Map out a zero section, safe because the last chunk of a disk 
			# will always exist.
			my $empty_chunks = 1;
			$empty_chunks++ until (defined($disk_map->[++$chunk_num]));
			$chunk_num--;

			my $empty_sectors = $empty_chunks * (CHUNK_SIZE / SECTOR_SIZE);
			$table  .= sprintf "%i %i %s\n", $sector, $empty_sectors, "zero";
			$sector += $empty_sectors;
		}
	}

	return $table;
}


#-------------------------------------------------------------------------------
# Returns a hashref that maps out each disk in the xva and the location of
# every non-zero sized chunk of data.
#-------------------------------------------------------------------------------
sub make_xva_map {
	my ($xva_file, $xva_map_file) = @_;

   	open(my $fh, "<:raw", $xva_file);

   	my %xva;
   	my $xva_size = (stat $xva_file)[7];
   	my $offset   = 0;
   	while (my $hdr = read_tar_header($fh, $offset)) {
   		printf("  - indexing xva: %0.2f\r", ($offset * 100) / $xva_size);
   		$offset += 512;

   		# Ignore the empty chunks since this will be read only.
   		if ($hdr->{name} =~ m{^Ref:(\d+)/(\d+)\0+$} && $hdr->{size} != 0) {
	   		$xva{$1}[$2] = [$offset, $hdr->{size}];
   		}

   		$offset += $hdr->{size} + $hdr->{padding};
   	}

    close($fh);
    print "  indexing xva complete\n";
    print "  map saved to: $xva_map_file\n";
	store(\%xva, $xva_map_file);

    return \%xva;
}


#-------------------------------------------------------------------------------
# Returns a hashref with the tar header at $offset or the current file 
# position. Returns undef at the end of the tar. This will advance the file 
# position by 512 bytes.
#-------------------------------------------------------------------------------
sub read_tar_header {
    my ($fh, $offset) = @_;

    sysseek($fh, $offset, SEEK_SET) if (defined($offset));
    sysread($fh, my $tar, 512);

    # The last 1024+ bytes of a tar are 0 so a 0 for the filename 
    # should catch end of the tar.
    return undef if (ord(substr($tar, 0, 1)) == 0);

    # Numbers in the tar header are stored in ascii octal.
    my $size = oct(substr($tar, 124, 11));

    return {
        name    => substr($tar, 0, 99),
        size    => $size,
        padding => (($size + 511) & ~511) - $size,
    };
}